Showing posts with label recipes. Show all posts

Wednesday, April 13, 2016

Chocolate Chip Banana Muffins

 A few weeks ago we visited family in Oregon and were fed very well by my husband's aunt. She is an excellent cook and I asked for her recipe for pretty much every meal we ate while we were there because they were all amazing! From creamy hot chocolate, to orange rolls, fruit stuffed pork tenderloin, beef stews, Swedish Nut Bread, numerous fruit dishes, and Chocolate Chip Banana Muffins, we had quite the selection. This is her recipe for Chocolate Chip Banana Muffins. The best part about this recipe is that it is a basic muffin recipe and can be altered to include different varieties of ingredients. There were several other options on the recipe, including raspberry almond muffins, but I really enjoyed the banana that she made so I have made it twice already since we have been home.


Chocolate Chip Banana Muffins
Makes 1 Dozen
2 cups flour
1 TBSP baking powder
1/4 cup sugar
3/4 tsp salt
2 eggs
1 cup milk
1/3 cup canola oil
1 1/2 tsp vanilla extract
Optional:
1 mashed banana
1/2 cup chocolate chips
  1. Preheat oven to 400 degrees F. Line muffin tin or grease.
  2. In a medium bowl, combine flour, baking powder, sugar, and salt. In a large bowl, beat eggs, milk, oil, and vanilla for 1 minute on medium. Add to flour mixture. Beat just until no streaks of flour remain-- do not over mix!
  3. Stir 1 mashed banana and 1/2 cup chocolate chips into batter.
  4. Spoon batter into muffin  cups. Bake for 18-20 minutes or until tops of muffins spring back when pressed lightly. Transfer muffins to a rack to cool slightly.

Monday, March 14, 2016

Irish Soda Bread

My family has a few ancestors that hail from Ireland, but we don't make a huge deal out of celebrating St. Patrick's Day. On occasion we will have a simple Corned Beef and Cabbage meal every few years and my mom has always made this Irish Soda Bread to go with our meal. Eat it warm with butter melting down it and it is so good!

Irish Soda Bread
8-inch round pan or a baking sheet, 375 degrees F.

3 cups flour
2 teaspoons baking powder
1/2 teaspoon baking soda
1 tablespoon sugar
1/2 teaspoon salt
1 1/2 cups buttermilk (or use 1 1/2 cups milk soured with 1 1/2 tablespoons white vinegar)
1 tablespoon butter, melted

Sift dry ingredients together into a bowl. Add buttermilk all at once, and mix with a fork just until blended. Turn dough onto a lightly floured board and knead lightly until smooth. Shape into a ball and place in a well-greased pan or on a well-greased baking sheet. Use your hands to flatten dough into a 7-inch circle. With a sharp knife, score top, cutting about 1/4 inch deep and in about 2-inch squares. Bake about 30 minutes, or until lightly browned and loaf sounds hollow when flipped. Turnout onto cooking rack; brush with melted butter. Cool completely before cutting.

Monday, February 22, 2016

Asparagus Pasta

I've been making this pasta dish for years. The whole family loves it because it is light, flavorful, and offers different variety from the typical pasta with red sauce combo. I love making this meal because seeing asparagus on sale during the last few weeks of winter and first few weeks of spring reminds me that the end of the cold is in sight. 
Asparagus Pasta
(Slightly modified from Lion House Lite Recipes)
1 package (8-12 ounces) bowtie pasta
1 pound fresh asparagus
2 cloves garlic, minced
1/2 teaspoon crushed red pepper flakes
2 dashes hot sauce
1/4 cup olive oil
1 Tablespoon butter
salt to taste
1/4 teaspoon pepper
1/4 cup grated Parmesan cheese

Cook pasta according to directions on the package, drain and set aside.
Cut asparagus into 1 1/2 inch pieces. Combine garlic, red pepper flakes, and hot sauce with oil and butter in a frying pan. Saute over medium heat for 2-3 minutes. Stir in asparagus, salt, and pepper and continue cooking, stirring frequently until asparagus is tender-crisp. This will usually take about eight minutes. Place pasta in serving bowl and pour asparagus over pasta. Sprinkle with Parmesan cheese and toss to combine. 

Monday, January 11, 2016

My Go-to Winter Fruit Salad

I cannot take credit for the deliciousness that is this recipe, only for the pretty photos that I took of what is now my go-to potluck dish for winter parties. Sadly pomegranate season is of very short duration, otherwise this would be my go-to dish year-round. I found this recipe for a Winter Fruit Salad and it is just too good not to share. It is very simple and very healthy. It calls for the following:

2 Pink Lady Apples, cored and diced
2 Pears, cored and diced
4-6 Mandarin Oranges, peeled and separated (This is my modification and I think it tastes better this way, the original recipe called for 2 large oranges) 
Seeds from 1 Pomegranate 
Juice from 1/2 lemon
1 T Honey
Mint (The original recipe calls for the mint as a garnish but I think the mint adds a nice kick to the salad and tastes great so I say why not add more and incorporate it, not just use it as a garnish.) 

Mix it all together and enjoy!


Wednesday, January 6, 2016

Creamy Chicken Noodle Soup

My sister gave me this recipe a few years ago (she gives me a lot of great recipes) and it is so easy and yummy that I rarely look elsewhere when I am in the mood for Chicken Noodle Soup. It is the Chicken Noodle Soup recipe that her in-laws swear by. The recipe calls for homemade noodles and they are worth the effort when I make them, but when I am feeling lazy I just throw in a package of egg-noodles from the store and it still tastes great!

Creamy Chicken Noodle Soup 
(Recipe by Amy Watkins)
Makes 8-10 generous servings

Ingredients:
8 cups chicken broth or bouillon
1-2 cups diced cooked chicken
1 cup milk (Use whatever variety from skim to half-n-half, depends on how creamy you want it.)
1 cup quartered, thinly sliced carrots
1 cup sliced celery
1/2 cup green pepper
1/2 cup chopped onion (or onion soup mix)
1 clove minced garlic
1/2 dried Italian seasoning (and whatever else you want to taste - sometimes I use dill)
Salt and Pepper to taste
Combine everything in pot (except for the milk) over medium heat and cook until vegetables are tender crisp. Add noodles and cook until almost done. In a cup whisk together 1/2 cup milk and 1/4 cup flour and stir into the soup. Boil gently for 3 minutes. Stir in 2 T butter.

Homemade Noodles for Chicken Noodle Soup 
(Recipe by Amy Watkins)

Ingredients:
1 tsp salt
2 cups flour
3 eggs
1 T vegetable oil
2-4 T cold water
Place flour and salt in a large bowl; make a well in the center and put eggs and oil in it. Gradually stir flour in from edges adding water 1 T at a time, until flour is moistened enough to form a ball; knead on floured surface until smooth. Let rest 10 minutes. Roll out very thin (they swell when cooked) let dry for about 2 hours. I roll the dough out very thin and put it on a cookie sheet then cut with a pizza cutter to desired width before I leave them to dry. They don't need to be covered or separated or anything to dry. When you're ready just take them off the cookie sheet with a spatula and throw them in the pot. In a pinch I don't even let them dry all the way, but they can stick together a little more.) This recipe makes tons of noodles. Add as many as you would like to the soup. 

Monday, January 4, 2016

Homemade Peanut Butter Twix Bars

So I realize that January, the month of resolutions for healthy eating is hardly the time to post a recipe for peanut butter chocolaty goodness, especially considering I am doing a dessert free January, but several people requested this recipe from me a few days before Christmas and I am finally getting around to posting it.

The original Peanut Butter Twix Bars with the vanilla cookie inside are my husbands' favorite candy bar ever. Shortly after we started dating in 2007, the Mars Chocolate company stopped making them and replaced them with a chocolate cookie inside. While it was a sad day for my husband, it also proved to be a good thing because we were forced to make our own and in our opinion these taste even better. We found this recipe in a cookbook that I turn to whenever I feel like eating out but don't want to leave the house and/or pay to eat out, called A Treasury of Top Secret Recipes by Todd Wilbur. I have made these Peanut Butter Twix Bars every Christmas since we first met and they are definitely a permanent holiday tradition in our house. Thankfully Mars brought the Peanut Butter Twix Bars with the vanilla cookie back a few years ago so we can enjoy Peanut Butter Twix Bars year-round (they are usually our treat of choice when stopping at the gas station on road trips) but this homemade version will stick around for years to come.

Homemade Peanut Butter Twix Bars
Recipe from A Treasury of Top Secret Recipes by Todd Wilbur

1 box (40) Nabisco Lorna Doone shortbread cookies
1 cup smooth peanut butter
1/2 cup powdered sugar
Two 12-ounce bags milk-chocolate chips (or milk-chocolate + semi-sweet, I have tried both ways and enjoy both)

1. Place the shortbread cookies side by side on an ungreased cookie sheet.
2. Mix 1 cup peanut butter with 1/2 cup powdered sugar until incorporated.
3. Spoon or spread a dab of the peanut-butter mixture onto the shortbread cookies. The mixture will be of a consistency that allows you to spread it with your fingers.
4. Place the cookies in the refrigerator until the peanut butter firms up.
5. Place chocolate chips in a microwave safe-bowl and heat them for 1 minute. Stir and heat for 20 second increments until melted thoroughly.
6. One at a time, rest each cookie on a fork and dip into the chocolate. Tap off the excess chocolate and then place on the tray and allow to cool to room temperature. The original recipe suggests placing them on waxed paper, I just put them back on the baking sheet and place the cookies in the freezer. If they don't remove easily, just use a spatula and carefully lift them off. We like to store ours in the freezer and eat them frozen. 

Tuesday, December 8, 2015

Baked Vegetarian "Chimichangas"

By definition a chimichangas are fried and so this is not a chimichanga per say. Despite being baked and full of veggies, they are delicious and quite healthy. My sister-in-law came up with the basic recipe a few years ago and it has become a great recipe to have on hand when I am cooking dinner last-minute from pantry staples.  I have modified it over the last few years to meet our needs (and what has been in my fridge) and while we have enjoyed eating these chimichangas in the past, my most recent modification (Cotija cheese) was a real game changer taking these from good to amazing. This recipe is also great for doubling and using as a freezer meal.

Baked Vegetarian Chimichangas Recipe
1 Bell Pepper, diced (green, red, or yellow)
2 cloves garlic
1/2 onion
4-5 handfuls spinach
1 can beans (pinto or black)
1 cup frozen corn
1 teaspoon chili powder
1/2 teaspoon cumin
hot sauce (a few drops)
1/2 cup cooked rice (I've used brown, white, Spanish rice, etc.)
Uncooked flour tortillas
1 cup Cotija Cheese


1. Preheat oven to 425 degrees.
2. Heat 1 Tablespoon Olive Oil and 1/8 to 1/2 teaspoon of hot sauce (depending upon preferred spiciness) in a cast-iron skillet.
3. Sautee diced pepper, garlic, and onion for 2-3 minutes until they start to soften. Add spinach, beans, corn, and spices and cook until the spinach begins to wilt. Add rice and mix.
4. Cook the tortillas and then divide the cheese and filling between the tortillas. This recipe usually makes 8-10 chimichangas depending upon how full you fill your tortillas. Fold the sides into a rectangle and bake for 15-20 minutes until brown and crispy. 

I serve them with salsa, my favorite salsa being this recipe which I always have a fresh batch of in our fridge--we eat a lot of salsa at our house. 

Tuesday, November 17, 2015

Chicken Cordon Bleu

I have enjoyed Chicken Cordon Bleu for many years, and I learned how to make it in college as a dating strategy to impress boys. It worked by the way. The unfortunate thing about making Chicken Cordon Bleu, is that there are some unpleasant steps (if you're like me and hate touching raw meat) that are necessary to achieve the end result, which by the way is superb! Because I dislike pounding the raw meat so much, I don't make Chicken Cordon Bleu often and so when I do it is quite a treat.  

Chicken Cordon Bleu 
(Recipe slightly adapted from Our Best Bites: Mormon Moms in the Kitchen cookbook) 
3 chicken breasts
1/2 tsp garlic powder
1/2 tsp onion powder
1/2 tsp salt
1/4 tsp pepper
1 cup shredded provolone cheese (or six slices of provolone)
12 slices thinly sliced ham
1/2 cup flour
2 eggs, beaten
1 cup breadcrumbs (I used Panko breadcrumbs this time but I have also used regular breadcrumbs. Both taste great.) 
1 tsp parsley
1/2 cup shredded Parmesan cheese
1 1/2 Tbsp butter, melted

1. Preheat oven to 350 degrees F. Grease a 9x13 glass dish.
2. Horizontally slice each chicken breast in half. Use a meat mallet to pound each piece until 1/2-inch thick.
3. Mix garlic powder, onion powder, salt, and pepper and sprinkle on one side of each chicken breast.
4.  Top each chicken breast with shredded cheese (or you could used sliced cheese.)
5.  Place two-pieces of ham on each chicken breast.
6. Using a toothpick to secure each chicken breast, roll them up.
7. Combine Parmesan cheese, parsley,  and bread crumbs and place in a shallow bowl.
8. Place beaten eggs in a shallow bowl.
9. Place flour in a shallow bowl.
10. Roll each chicken breast in flour, then egg, and then in the bread crumbs. Press the bread crumbs into the chicken breast to ensure that they stick.
11. Pour melted butter evenly over the chicken breasts.
12. Bake for 25-35 minutes. 

Monday, November 16, 2015

Richest Ever Chocolate Chip Cookies

When it comes to chocolate chip cookies most people have strong preferences and opinions. Perhaps it is because chocolate chip cookies bring memories of home. Crunchy cookies versus soft and chewy cookies, bakery bought versus homemade, dark chocolate chips versus milk chocolate chips, a sprinkle of salt on top or not, and the list of varieties could go on and on. Personally I prefer a soft and chewy chocolate chip cookie. My husband loves hard and crunchy cookies. We are at odds in our house when it comes to chocolate chip cookies but since I am the baker and my husband's mom lives relatively close and he can go to his parents house to get crunchy cookies, the soft and chewy cookies nearly always win. As a child I loved chocolate chip cookies so much that my mom taught me how to make them when I was seven so that I could be on cookie duty and not request that she make them a half-dozen times a week. :) This is the recipe I grew up making and it comes from an old cookbook that my mom has called With Singleness of Heart. I have tried recipes from other cookbooks and from numerous blogs and this is the recipe that I always prefer. This recipe makes enough to serve a very large crowd (about 80 large cookies) and since it is not often that I have to feed a large crowd, it is great that the dough freezes very well, as do the cookies if you have already baked them all. 


Richest Ever Chocolate Chip Cookies
Makes about 80 large cookies. 

2 cups butter
3 eggs
2 cups sugar
2 cups brown sugar (packed)
1 tsp. vanilla
6 cups flour
1 1/2 tsp salt
1 1/2 tsp baking soda
3 cups chocolate chips
1 1/2 cups chopped nuts

Beat butter, eggs, sugars and vanilla until light and creamy. Sift flour, salt, and baking soda together and add to creamed mixture; blend thoroughly. Stir in chocolate chips and nut. (Dough should be slightly crumbly.) Drop dough by large spoonfuls from a small ice cream scoop. Bake at 350 degrees for 8 to ten minutes or until cookies are light and look not quite done. Don't over bake. Remove from cookie sheet immediately and cool on racks. Makes about 80 large cookies. Cookies are delicious warmed in the microwave oven for a few seconds.

Thursday, October 15, 2015

Chicken Kelly


I picked this recipe up from one of my college roommates. It can best be described as comfort food and is a chicken casserole that is packed with flavor and cheesy goodness. I make it once a year at most because it is so rich, but it is a recipe that brings a bit of nostalgia each time I cook it.   

Chicken Kelly
6 chicken breasts
2 eggs
2 cups bread crumbs
1 tbsp parsley flakes
2 tbsp margarine per pan of browning
1 tsp garlic powder
3-4 to 1 lb of Munster cheese
3 chicken broth cubes
1 1/2 cups water
  1. Cut chicken into bite sized pieces.
  2. Marinate in 2 beaten eggs for two hours. (I sometimes do this step the night before to make the next day easier.)
  3. Combine bread crumbs, parsley, and garlic.
  4. Drain chicken from the egg marinade and coat pieces with the bread crumb mixture.
  5. Brown chicken in skillet with 1 T butter (Use additional butter if you use an extra skillet or cook the chicken in multiple batches because it may be too much chicken for one skillet.)
  6. Melt 1 T butter in a 9x13 glass dish.
  7. Layer chicken, mushrooms, cheese. (I threw in some cooked broccoli the last time I made this and it was pretty good but the original recipe does not call for this.) 
  8. Dissolve 3 chicken bouillon cubes in 1/2 cup water and pour over chicken.
  9. Bake for 45 minutes at 350 degrees. 

Thursday, October 8, 2015

Apple Crisp: a simple family recipe.

We have a serious obsession with apples at our house. I can buy sixteen apples at the store and they are gone two days later. As someone who formerly disliked fruit (I'm crazy, I know) I find it hard to believe that I often crave fruity desserts and this apple crisp recipe is one of my go-to recipes. I got the recipe five years ago when we visited my husband's great uncle and great aunt in North Carolina. Great Aunt Julee was born and raised in the South and this is the recipe she grew up eating. It is simple, quick to prepare, and delicious...especially when topped with vanilla ice cream. 

  Apple Crisp
Bake at 350 degrees for 30 minutes, followed by 300 degrees for 30 minutes. 
1. Grease a large baking dish with butter and set aside.
2. Peel and slice enough apples (approximately 5-6) to fill the baking dish.
3. In a mixing bowl, mix the following until crumbly: 1 cup Flour, 1 cup white sugar, 1 teaspoon baking powder, 1/2 teaspoon salt, 1/2 teaspoon cinnamon, and 1 unbeaten egg. Cover apples with this mixture.
4. Melt 1/3 cup butter in the microwave and pour over all. 

Monday, September 28, 2015

Making Leftovers Taste Less Like "Leftovers" (Meal Planning with Versatile Recipes) + Bean and Hominy Chili

I am by no means an expert at meal planning but over the years I have picked up a few habits that make weeknight cooking less tiresome. Namely planning and cooking recipes that can be used a second time with a totally different spin on the presentation making the leftovers taste less like "leftovers." I know a lot of people dislike leftovers but I love them! They are great because they make a great lunch the next day, and or dinner on another weeknight. 

One of my favorite combinations of meals that I have found include chili one night and on another night that week, Navajo Tacos. I have several chili recipes that I enjoy, including Chipotle Chocolate Chili from the Our Best Bites blog when I want a really spicy chili,  Jalapeño Popper Chili when I want a white chicken style chili, and Bean and Hominy Chili from the cookbook Kitchen Confidence: Essential Recipes and Tips that Will Help You Cook Anything by Kelsey Nixon. I checked out Kitchen Confidence from the library because I was intrigued when I realized that I had attended Girl's State with Kelsey back in high school, and I am so glad I did because there are several great recipes in this cookbook.  

Other weeknight recipe combos that make for several great meals include: 
Night 1: Cafe Rio Style Pork Salads      Night 2: Cafe Rio Style Pork Burritos
Night 1: Refried Beans without the Refry made into burritos      Night 2: Nachos
Night 1: Salmon Burritos     Night 2: Union Grill Salmon Pasta Salad (Sometimes I plan for salmon the same week we have Cedar Plank Burgers so that I can have my husband grill the burgers and the salmon at the same time.) 

Additional recipes that can be used multiple times throughout a week, but aren't a meal by themselves: 

Bean and Hominy Chili
Adapted slightly (I hate chunks of stewed tomatoes so I puree them before I add them) from Kitchen Confidence: Essential Recipes and Tips that Will Help You Cook Anything.

2 tablespoons vegetable oil
2 medium onions, finely chopped
1 poblano pepper, chopped
3 garlic cloves, minced
3 tablespoons chili powder
1 teaspoon ground cumin
1 teaspoon ground coriander
1 teaspoon kosher salt, plus more as needed
1 (14.5-ounce) can fire-roasted whole tomatoes, crushed by hand
1 (15.5-ounce) can white hominy, drained and rinsed
1 (15.5-ounce) can black beans, drained and rinsed
1 (15.5-ounce) can red kidney beans, drained and rinsed
1. In a large soup pot on medium-high heat, heat the oil. Add the onions and poblano and cook, stirring, until softened and beginning to brown, about 5 minutes. Add the garlic, chili powder, cumin, coriander, salt and cayenne (if using). Cook, stirring constantly, until the spices are fragrant and toasted, 1 to 2 minutes. Add the tomatoes and bring to a simmer. Add the hominy, black beans, kidney beans, and 4 cups water. Bring to a boil, reduce the heat to medium-low, cover, and simmer until thickened, about 45 minutes. Season to taste with salt.

When we have Navajo Tacos for dinner I make a quick batch of scones or fry up a can of pre-made biscuits (I learned that trick from a co-worker at my first teaching job) and add leftover chili, salsa, lettuce, tomatoes, bell peppers, cheese, and anything else that sounds good.

Friday, August 21, 2015

Cedar Plank Burgers

     Although I have started cooking meat less often in recent years, one thing I can never pass on is a good hamburger. And when it comes to hamburgers there is nothing I love more than a burger cooked on a cedar plank . . . or an In-N-Out Burger. 
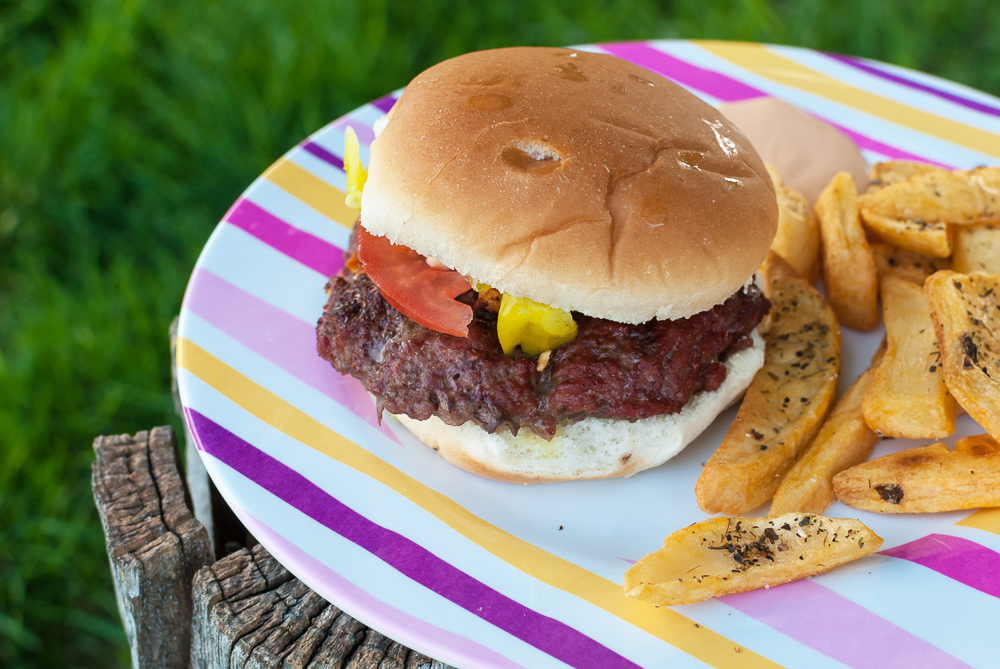
    We don't really do anything special when seasoning the burgers because the incredible flavor and texture (very moist) comes from grilling the meat on a cedar plank. In the past I have bought ours near the charcoal in our local grocery store, but these cedar planks from Amazon are a much better price. Each time we cook the burgers we tend to season them a little differently. Last week we ate them twice because my daughter requested them for dinner on the first night of school after she enjoyed them so much last weekend. The first time we mixed a little feta cheese and garlic into the burgers, the second time we just used salt, pepper, and a little bit of garlic sauce. Usually we cook roughly one pound of meat, shaped into four burgers. Grill for about twenty minutes/and or cooked until done. I can guarantee that once you try a cedar plank grilled burger it will be hard to go back to anything else! 


Tuesday, July 7, 2015

Chicken with Yogurt - A meal made using pantry staples.


This is one of my go to meals when I haven't been shopping in a long time and have not planned dinner. I almost always have the ingredients on hand because they are all pretty basic pantry staples. I got the recipe from my mother-in-law several years ago and it is a meal that my husband grew up eating. It is a very filling meal and is very simple and easily thrown together at meal time. I usually serve this chicken over rice but quinoa is delicious too. 

Chicken with Yogurt
1/4 cup sliced or chopped almonds
1 T butter
4 chicken breasts
1 T butter
1/2 tsp paprika
1/4 tsp dill weed
1/4 tsp salt
1/3 cup water
1 cube chicken bouillon
1 medium onion
1/2 cup plain yogurt (I've also used Greek Yogurt and it works well also)
1 1/2 tsp cornstarch
1/4 cup cold water

-Cook almonds in 1 T melted butter until golden brown.
- Cube chicken and brown in 1 T butter until golden brown. Reduce heat and sprinkle with paprika, salt, and dill.
-Mix 1/3 cup water with bouillon. Pour over chicken. Add onion and simmer covered for 30 minutes.
-Remove chicken from pan and stir yogurt into the liquid remaining in the skillet.
-Mix cornstarch and 1/4 cup cold water and stir into the yogurt mixture.
-Heat to boiling and boil for one minute, stirring constantly. 
-Pour sauce over chicken and sprinkle with almonds.

Wednesday, June 17, 2015

Summer Cooking Lessons with Kids

My daughter finishes her online preschool in a few weeks and I've been trying to come up with ways for her to practice the things that she has learned this year in a fun and active way. Since she already likes to help me cook, we can work on reading, math/measurements, and cleaning in an enjoyable way. For the past few months I've been having her help with the grocery shopping. We've been comparing sizes and prices as we've shopped in an effort to help her become more familiar with numbers. For our first cooking activity we read through the ingredient list together and added anything that we needed to our grocery list. Before we started she helped me to get out all of the ingredients. Then I let her do the measuring and mixing and rolling. Pretty much the only thing she didn't help with was putting the tray into the oven and taking it out. We had so much fun making the cookies and eating them together!

Here is a great resource I found for helping with our lessons:

  • This is an excellent article that lists cooking activities that kids are capable of helping with by age with a few recipes that kids will enjoy helping with. 


I was looking through some old cookbooks the other day trying to eliminate the ones that I don't use, and I stumbled upon a recipe for Lemon Coconut cookies that I thought my five-year-old would enjoy helping to make because there is a step where the dough is rolled into balls (reminded me of playing with playdough.) This is the recipe that we cooked together this week. She has helped me quite often with baking in the past, but this is the first recipe where I really let her do most of the work.


Lemon Coconut Pixies
Slightly adapted from Hershey's Recipe Collection, 2008
(The recipe said it makes about 4 dozen cookies, for us it was more like 2.5 dozen. We must have rolled the cookies slightly larger.) 

1/4 cup butter, softened
1 cup sugar
2 eggs
2 1/2 tsp freshly grated lemon peel
1 1/2 cups flour
2 tsp baking powder
1/4 t salt
1 cup sweetened coconut flakes
powdered sugar 

1. Heat oven to 300 F
2. Beat butter, sugar, eggs, and lemon peel. Stir together flour, baking powder, salt.
3. Mix the lemon and flour mixtures together, stir in coconut.  Refrigerate for about an hour or until firm enough to roll.
4. Roll into 1 inch balls and roll in powdered sugar.
5. Place on an ungreased baking sheet and cook for 15-18 minutes. Immediately place cookies on cooling rack. Store in airtight container.


Monday, June 15, 2015

Blackened Salmon Burritos

This summer I am on a quest to make our meals as simple as possible. If I don't have to use the oven, great. If I only have to use one pan and a few additional serving bowls, even better! These were delicious, fresh, and flavorful. It will definitely be a year-round staple in our house.

Blackened Salmon Burritos
Ingredients:
Avocado
1/4 a head of cabbage
Mexican Creme
Queso Fresco
Olive Oil
Black Beans, one can
Frozen Corn, half a bag
Red Bell Pepper
Uncooked flour tortillas
Tony Cachere's Creole Seasoning
Paprika
Salmon, 1 pound

1. Cook tortillas and store in tortilla warmer. For my family of four I usually cook six tortillas. 
2. Combine: 1T olive oil, a can of drained and rinsed beans (I used black beans), and half a bag of frozen corn, and chopped red bell pepper into a cast iron skillet and sauté for a few minutes until peppers  begin to soften. Transfer to a serving dish.
3. Mix 2 tsps Tony Cachere's Creole Seasoning with 1 tsp paprika and rub into the salmon on the side without skin. Using a little olive oil, place salmon in the cast iron skillet with the skin facing upward and cook on medium heat for five minutes. Next flip the salmon and cook for another five minutes (or until the salmon begins to flake) with the skin down. At this point the salmon will slide easily off of the skin. 
4. Shred cabbage, slice avocado, and grate the Queso Fresco.
5. Assemble using all of the ingredients and enjoy!  

Wednesday, May 27, 2015

Slow Cooker Vegetable Lasagna


I love this recipe because it is easy to prepare, loaded with veggies, and it is one of few recipes that has zucchini as an ingredient that my husband will actually eat. I've been making it for a few years now and it has become a staple in our house year-round. It is great in the summer when the garden is bursting with zucchini (I wish I had that problem, I usually end up buying it because mine never grows) and the slow cooker doesn't heat up the house. In the winter it also makes for great comfort food. One of the best parts about this recipe is that it calls for regular lasagna noodles, but you don't have to boil them!

Slow Cooker Vegetable Lasagna
(Adapted from Raise Healthy Eaters)

Ingredients
1 cup mozzarella cheese (divide in half)
15 ounces cottage-cheese
2 eggs
1/4 cup grated Parmesan cheese
1 teaspoon salt (1/2 t for zucchini, 1/2 t for cheese mixture)
1 1/2 cups shredded carrots
3 cups shredded zucchini
Garlic spaghetti sauce (26 ounce jar)
10 lasagna noodles

Directions
-Shred carrots and cook in the microwave for 2 minutes.
-Mix 1/2 cup mozzarella, cottage cheese, eggs, Parmesan, and 1/2 t salt, and carrots.
-Mix 1/2 t salt with the zucchini
-In a greased slow cooker, layer: 2/3 cup sauce, noodles, 1 cup cheese, 1 cup zucchini, 2/3 cup sauce, and repeat.
-Top with 1/2 cup mozzarella.
-Cook on high for 3 hours.

Tuesday, May 26, 2015

Snack Time: Easy and Cheap Pudding Pops

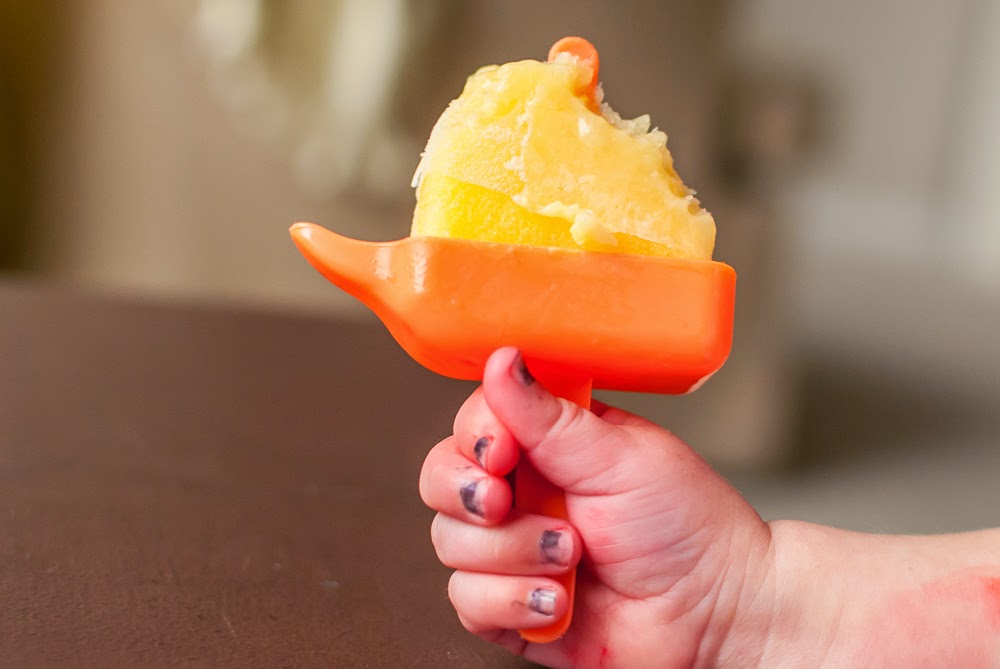
I suppose I can't say that these pudding pops are easier to make than Otter Pops, because you actually have to follow a few more steps than just placing them in the freezer. You have to mix the pudding, put it into the popsicle mold, and then wash the popsicle mold when the pudding pops are gone. Not a ton of effort and I like to think that they have a little more nutritional value in them because of the milk used to make the pudding.

Here is what you will need:
1 box of instant pudding, any flavor. I used the 5.25 oz package because it makes eight and I have eight spots in my popsicle mold. 
Milk (see package for amount)

I am sure I'm not the first person to think of these, but they've been a huge hit at our house for the past several weeks that I have to document this in case I forget and try to complicate things again.
I used to go through more effort in actually following a recipe, some of my favorites came from the Our Best Bites blog. The pudding pops from these recipes are delicious but call for extra ingredients such as half-and-half, which I don't always have on hand. After trying these a few times with the kids liking these just as much or better, for their snack time I will be sticking with these. Of course when I feel like a pudding pop, I will probably choose the fancier versions. 

So far their favorite flavors have been pistachio and vanilla. They said that the chocolate pudding pops were just ok. 

Wednesday, May 20, 2015

A kitchen argument that I didn't win. And a Corn Bread recipe.


      A few years ago my husband purchased a Lodge Cast-Iron Skillet and a silicone handle holder. The skillet only cost $15 and he was really excited to start using it. His instructions to me were to never clean it with soap, just use a stiff brush and a little bit of water.  Then dry it and coat it with a little bit of oil. Immediately, I scoffed at the idea of using a pan that sounded so "fussy," to clean. No soap? No way! Why on earth would I want to cook with that something that couldn't be thrown into the dishwasher like my Teflon? (I probably shouldn't put that in the dishwasher either...) 

     But then I started to cook with it, and I really liked it. Food wasn't getting caked on and burned, cleaning it took less time than washing it with soap, and the food just tasted better. Immediately I started using the cast-iron skillet exclusively, and I had to admit to my husband that he was right. Now I only use my teflon pans if I have to because I am cooking multiple things at once. Really I would like to throw them away and only keep two pans in my kitchen, the cast iron skillet and an Enamel Coated cast-iron dutch oven pot. They are pricey though so it is currently on my wish list. Also owning one in a large size, and one in a smaller size wouldn't be worst thing in the world. Green, Blue, or Aqua would be my preference. 


     I should note that since we picked up the original skillet, we added a mini-sized skillet to our collection that we picked up at a second-hand shop in Carson City, NV. Cast-iron has been used for cooking for 1,000s of years so obviously I was late to the bandwagon, but some of my favorite parts about using our cast-iron skillet are: that I don't have to use as much oil because food generally doesn't stick, the iron content in my food is increased from cooking with cast-iron, I don't accidentally swallow chemicals that start to chip off of the Teflon, it is very durable, and I can use it on the stove and in the oven which is awesome! Especially when I am cooking a Dutch Baby, or something else that has to stay warm. Actually funny story about cooking a Dutch Baby in the wrong kind of pan. I originally tried a 9x13 glass dish but it ended up too dense. Then I thought it might be a good idea to use a cheapo wok from Ikea. The only problem was that the wok had a wooden handle. When the oven started to smoke, I knew there was a problem. Cast-iron to the rescue! 
     And  since I pretty much use my cast-iron skillet for everything, here is one of my favorite recipes that tastes 100 times better when cooked in a cast-iron skillet--my favorite Corn Bread recipe. I usually just use my Better Homes and Garden cookbook, I have the 12th edition but the link that I included will take you to the online version of the recipe. It is delicious and so easy to make! I always have the ingredients on hand which makes it easy to whip some up as a last minute side dish. The best part about it is that the recipe takes less than five minutes to mix, and fifteen minutes to bake, so it can really be last minute!